


A gallery wall shouldn’t feel intimidating, expensive, or reserved for people who own laser levels and infinite patience.
It should feel doable. Forgiving. And honestly? Kind of fun.
This one was designed with real homes (and real budgets) in mind, using affordable frames, professional-quality prints, and a layout that looks intentional without feeling rigid.
Let’s make printing and hanging photos feel accessible. Because it should be.
The Goal
A gallery wall that feels balanced but not stiff.
Collected, not chaotic.
Elevated, without the luxury price tag.
The Print Sizes Used in the Gallery Wall
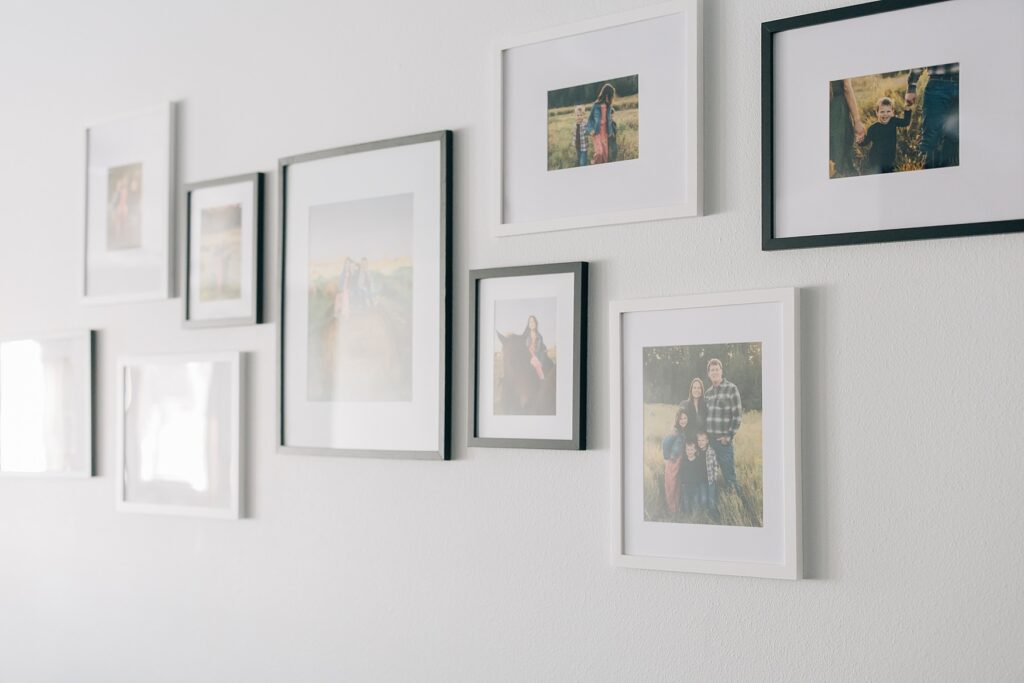
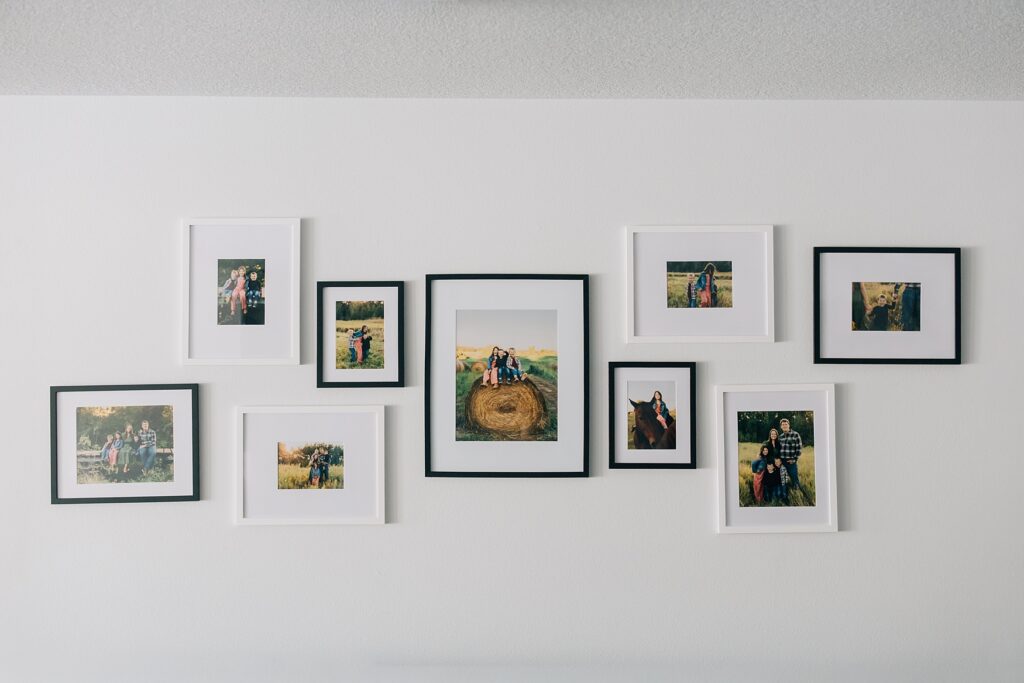
This gallery wall features nine prints, with enough variety to create visual interest while remaining cohesive.
- 1 · 11×14
- 2 · 8×10
- 6 · 5×7
The smaller sizes do more work than you think. They add texture and movement, keeping the wall from feeling too heavy at the top. And best of all, they help keep the gallery wall’s cost down.
All prints are ordered through ProDPI (linked below), which gives you true photo-lab quality without specialty pricing. Honestly, they are my best-kept secret. ProDPI used to only sell to professionals, but lucky for you, they’re now open to everyone.
LINK to the exact prints I buy: https://www.prodpi.com/products/prints/chromogenic-photo-prints/
The Frames (All With Mats)
Every frame for this wall came from Amazon, affordable, consistent, and easy to replace if needed. I will be real, though, these frames are CHEAP, and the quality matches the price. If you want something slightly more elevated, look for equivalent frames with glass panels at Target or your favorite department store.
Here’s the full breakdown:
- 1 · 16×20 frame (matted to 11×14)
- 6 · 11×14 frames (matted for 5×7 and 8×10 prints)
- 2 · 8×10 frames
Mats matter. They give smaller prints room to breathe and instantly elevate the final look, even with budget frames.
I did a mix of white and black frames, which is totally up to you; you’ll see most of these come in multiple color options.
Black 11×14: https://www.amazon.com/dp/B0F22M6VNN?ref_=ppx_hzsearch_conn_dt_b_fed_asin_title_1&th=1
Black 8×10: https://www.amazon.com/dp/B0F22MMMM4?ref_=ppx_hzsearch_conn_dt_b_fed_asin_title_2&th=1
White 11×14 (set of 4): https://www.amazon.com/dp/B07Q5PPGLM?ref_=ppx_hzsearch_conn_dt_b_fed_asin_title_2&th=1
There is nothing magical about these particular frames; they are simply exactly what you see in my gallery wall shown. And some of the most affordable I could find on Amazon.

How the Wall Is Spaced
This is where the magic happens.
Instead of perfect symmetry, the frames are spaced 2″– 4″ apart in a staggered layout.
Why it works:
- The 4″ gaps create air and softness
- The 2″ gaps pull the eye back in
- The stagger keeps it from feeling grid-like
It’s symmetry with personality. Structured, but relaxed.
If you’re hanging this yourself, use painter’s tape or paper templates first. You’re allowed to adjust as you go. I personally used a tape measure and a pencil to mark where to hang the frames on the wall.
Hanging Tip (That Saves Your Sanity)
Start with the largest frame and build outward.
Anchor the wall first.
Then let everything else fall into place.
You don’t need perfection. You need balance.
I personally placed the center frame first, then built out one frame on each side at a time.
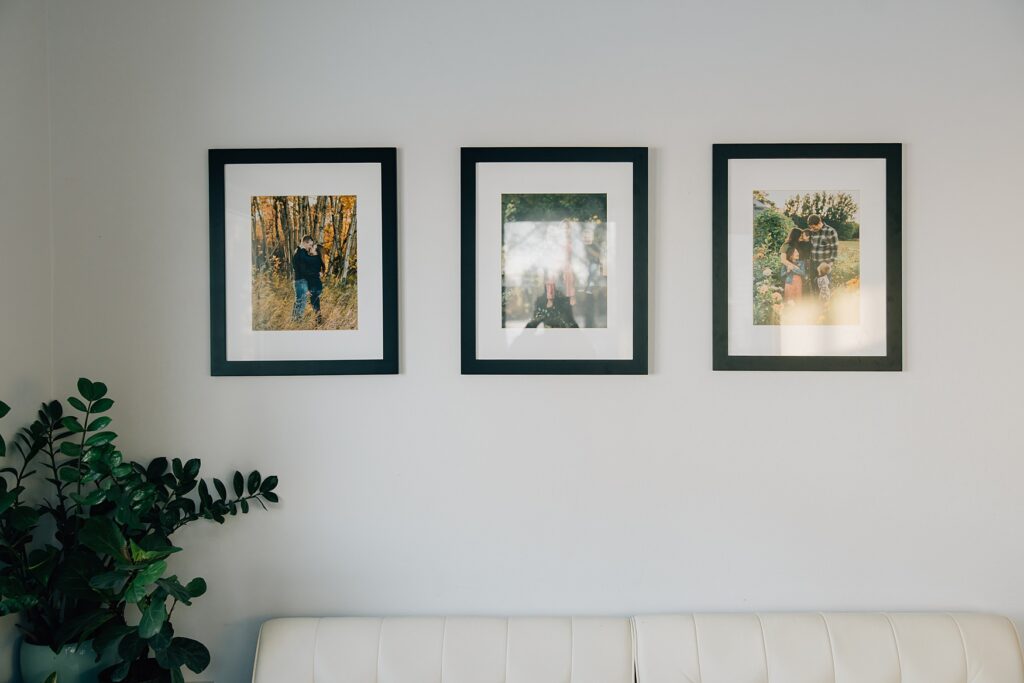
Bonus: A Super Simple Starter Gallery Wall
If you want something even easier, this is the cleanest place to begin.
The Setup
- 3 · 16×20 frames
- All matted to 11×14
- 3 · 11×14 prints
Hang them in a straight row or a soft vertical stack. That’s it.
It’s minimal. It’s timeless. And it looks finished without trying too hard.
Perfect for hallways, bedrooms, or that blank wall you’ve been avoiding.
Final Thought
You don’t need a massive budget to put your photos on the wall; you just need the right proportions, good printing, and a layout that gives everything space to shine.
This is proof that accessible can still feel intentional.
Need help creating images worthy of a gallery wall?
I’d love to work with you. Get in touch here and let’s create something you’ll actually want to frame.
.


